Starbucks Cake Pop Recipe (Easy Copycat)
Highlighted under: Baking Moments
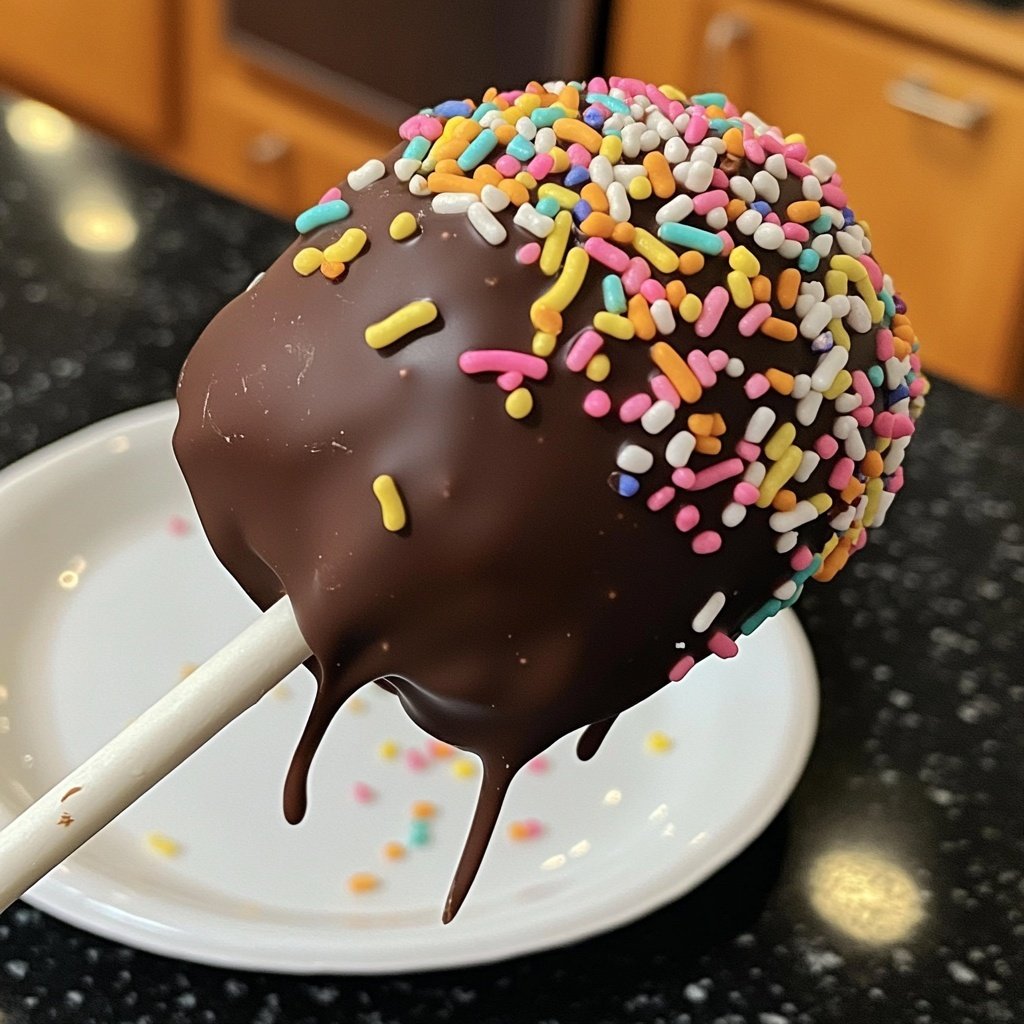
Recreate the delicious and iconic Starbucks cake pops in the comfort of your home with this easy copycat recipe.

This Starbucks Cake Pop recipe brings the delightful flavors of your favorite café treat right to your kitchen. Perfect for parties or a sweet snack!
Why You'll Love This Recipe
- Rich chocolate flavor paired with fresh orange zest
- Creamy texture that melts in your mouth
- Perfect for celebrations or as a sweet indulgence
The Joy of Homemade Cake Pops
Making cake pops at home is a delightful experience that brings creativity to your kitchen. Unlike store-bought versions, homemade cake pops allow you to choose the flavors, fillings, and decorations according to your taste. This recipe not only provides a classic chocolate option but also encourages you to experiment with different flavors, such as vanilla or red velvet, ensuring that every bite is tailored to your liking.
The process of crafting cake pops can be a fun activity for families or friends. It’s a great way to spend time together, especially during special occasions or holidays. Each person can roll their own cake balls and decorate them with a variety of toppings, turning dessert-making into a memorable event. Plus, sharing these homemade treats with loved ones will surely bring smiles and joy.
Perfect for Any Occasion
These cake pops are not just delicious; they are also versatile. Whether you're hosting a birthday party, a baby shower, or a holiday gathering, cake pops can elevate any event. Their bite-sized nature makes them perfect for guests who want to enjoy a sweet treat without committing to a full slice of cake. You can customize the colors and decorations to match your party theme, making them a stunning centerpiece on your dessert table.
Additionally, cake pops make excellent gifts. Wrap them in clear bags tied with ribbons, and you have a charming, homemade gift for friends and family. They are also great for office parties or as a treat for teachers, showcasing your thoughtfulness and creativity in a delightful way.
Storage and Serving Tips
To keep your cake pops fresh, store them in an airtight container at room temperature for up to a week. If you want to extend their shelf life, consider refrigerating them, but be sure to let them come to room temperature before serving for the best texture. If you’re preparing them in advance for an event, you can also freeze them after decorating. Just ensure they are well-wrapped to prevent freezer burn.
When it comes to serving, consider displaying your cake pops in a creative way. A cake pop stand or a simple styrofoam block can add an attractive touch to your dessert table. You can even mix and match flavors and colors for a vibrant display that will catch the eye of your guests, making your cake pops not just a treat but also a visual delight.
Ingredients
Gather the following ingredients to create your delicious cake pops:
For the Cake:
- 1 box of chocolate cake mix
- 3 large eggs
- 1 cup of water
- 1/2 cup of vegetable oil
For the Frosting:
- 1 cup of butter, softened
- 4 cups of powdered sugar
- 1/4 cup of milk
- 1 teaspoon of vanilla extract
For Coating and Decoration:
- 1 cup of chocolate melting wafers
- Sprinkles, for decoration
- Lollipop sticks
Make sure everything is measured and ready before you start the preparation.
Instructions
Follow these simple steps to create your cake pops:
Bake the Cake
Preheat your oven to 350°F (175°C). Prepare a cake pan and mix the chocolate cake mix according to package instructions. Bake for 30 minutes or until a toothpick inserted into the center comes out clean. Let it cool completely.
Make the Frosting
In a large bowl, beat the softened butter until creamy. Gradually add powdered sugar, milk, and vanilla extract, mixing until smooth and fluffy.
Combine Cake and Frosting
Once the cake is cooled, crumble it into a large bowl. Add half of the frosting and mix until well combined. Adjust the mixture until it’s moist enough to form into balls.
Form the Cake Balls
Roll the mixture into 1-inch balls and place them on a baking sheet lined with parchment paper. Freeze for about 15 minutes to firm up.
Dip and Decorate
Melt the chocolate wafers in a microwave or double boiler. Dip the end of each lollipop stick into the melted chocolate and then insert it into the center of each cake ball. Dip the entire cake pop into the chocolate, allowing excess to drip off. Decorate with sprinkles while the chocolate is still wet.
Let Set and Enjoy
Place the finished cake pops in a styrofoam block or a cake pop stand to set. Once the chocolate has hardened, they are ready to be enjoyed!
Enjoy your homemade cake pops as a delightful treat!
Pro Tips
For added flavor, consider mixing in complementary extracts or adding a dash of coffee to the cake mix.
Frequently Asked Questions
One common question is whether you can use homemade cake instead of a box mix. Absolutely! You can bake your favorite chocolate cake recipe, but make sure it’s moist enough to hold together when crumbled. The key is achieving the right consistency for rolling into balls.
Another question often asked is about dietary modifications. You can easily make these cake pops gluten-free by using a gluten-free cake mix and ensuring that your chocolate wafers and sprinkles are also gluten-free. For a dairy-free version, consider using plant-based butter and almond milk for the frosting.
Variations to Try
While the classic chocolate cake pop is delicious, don’t hesitate to explore other flavors! Try lemon cake with a white chocolate coating for a refreshing twist, or a rich red velvet cake topped with cream cheese frosting. The possibilities are endless, and your creativity is the only limit.
You can also experiment with different coatings. Instead of chocolate wafers, consider using candy melts in various colors or even yogurt coatings for a lighter option. This not only adds flavor but also lets you personalize your cake pops for different occasions.
Questions About Recipes
→ Can I use a different cake flavor?
Yes, you can substitute the chocolate cake mix with vanilla, red velvet, or any flavor you prefer.
→ How do I store leftover cake pops?
Store cake pops in an airtight container in the refrigerator for up to a week.
→ Can I freeze cake pops?
Yes, you can freeze uncoated cake pops for up to 3 months. Just thaw before coating.
→ What can I use instead of chocolate melting wafers?
You can use tempered chocolate or candy melts as alternatives.
Starbucks Cake Pop Recipe (Easy Copycat)
Created by: Adeline Morris
Recipe Type: Baking Moments
Skill Level: Intermediate
Final Quantity: 12 cake pops
What You'll Need
For the Cake:
- 1 box of chocolate cake mix
- 3 large eggs
- 1 cup of water
- 1/2 cup of vegetable oil
For the Frosting:
- 1 cup of butter, softened
- 4 cups of powdered sugar
- 1/4 cup of milk
- 1 teaspoon of vanilla extract
For Coating and Decoration:
- 1 cup of chocolate melting wafers
- Sprinkles, for decoration
- Lollipop sticks
How-To Steps
Preheat your oven to 350°F (175°C). Prepare a cake pan and mix the chocolate cake mix according to package instructions. Bake for 30 minutes or until a toothpick inserted into the center comes out clean. Let it cool completely.
In a large bowl, beat the softened butter until creamy. Gradually add powdered sugar, milk, and vanilla extract, mixing until smooth and fluffy.
Once the cake is cooled, crumble it into a large bowl. Add half of the frosting and mix until well combined. Adjust the mixture until it’s moist enough to form into balls.
Roll the mixture into 1-inch balls and place them on a baking sheet lined with parchment paper. Freeze for about 15 minutes to firm up.
Melt the chocolate wafers in a microwave or double boiler. Dip the end of each lollipop stick into the melted chocolate and then insert it into the center of each cake ball. Dip the entire cake pop into the chocolate, allowing excess to drip off. Decorate with sprinkles while the chocolate is still wet.
Place the finished cake pops in a styrofoam block or a cake pop stand to set. Once the chocolate has hardened, they are ready to be enjoyed!
Extra Tips
For added flavor, consider mixing in complementary extracts or adding a dash of coffee to the cake mix.
Nutritional Breakdown (Per Serving)
- Calories: 150 kcal
- Total Fat: 7g
- Saturated Fat: 4g
- Cholesterol: 20mg
- Sodium: 50mg
- Total Carbohydrates: 20g
- Dietary Fiber: 1g
- Sugars: 12g
- Protein: 2g