Homemade Reese’s Cups with Sea Salt
Highlighted under: Baking Moments
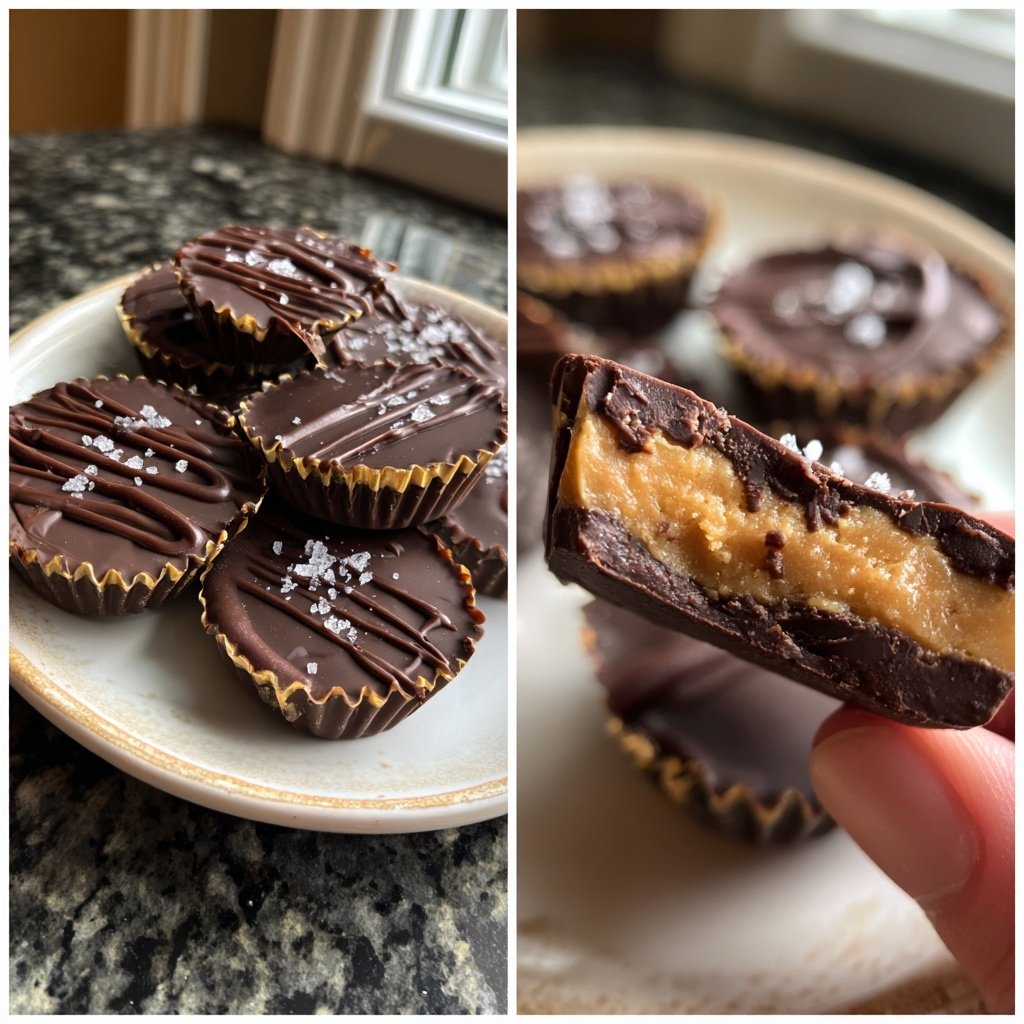
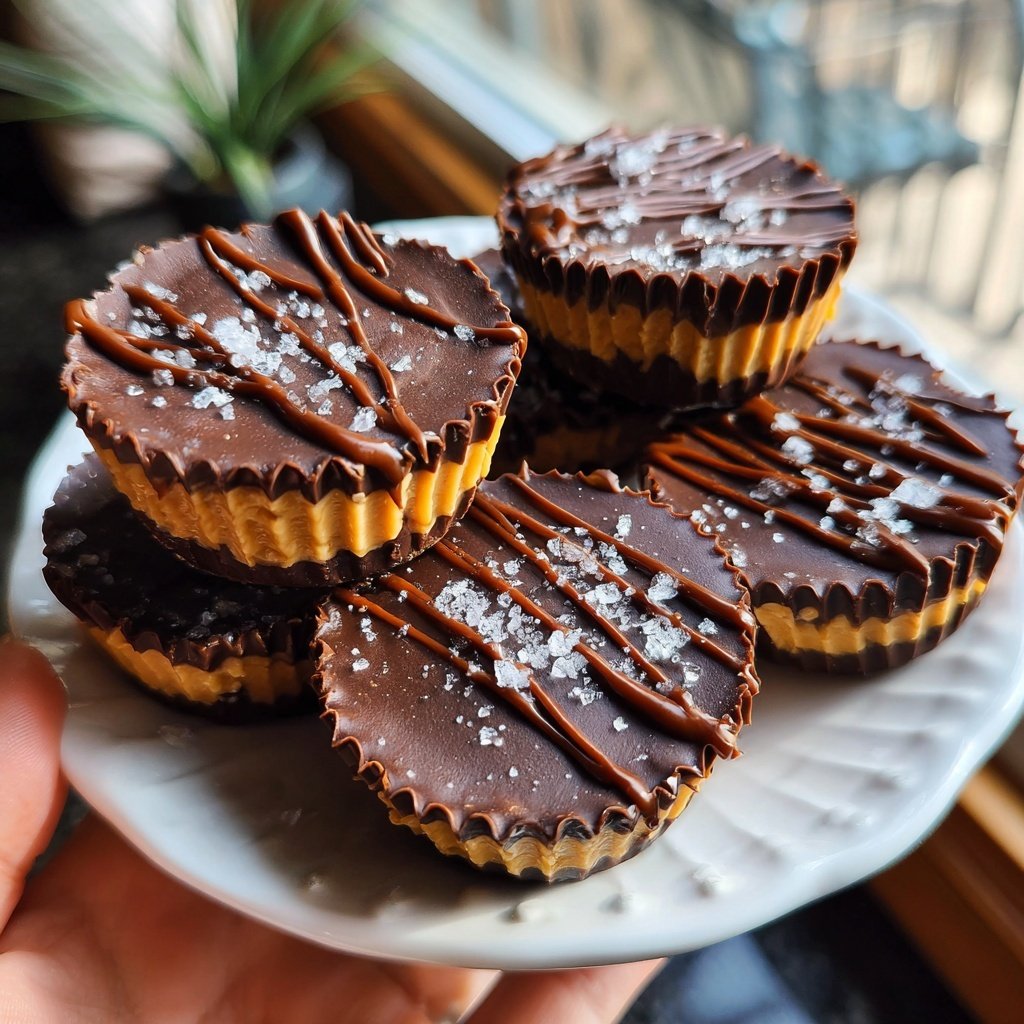
I absolutely love making my own Reese’s Cups at home! The combination of rich chocolate and creamy peanut butter is irresistible, and adding a sprinkle of sea salt elevates these treats to a whole new level. Each bite brings a satisfying crunch topped with a creamy center that just melts in your mouth. Homemade treats like these are perfect for sharing during gatherings or enjoying as a sweet indulgence with a movie. Plus, they're easier to make than you might think, and you'll never want the store-bought version again!
When I first tried making Reese’s Cups from scratch, I was amazed at how simple the process was. I started by melting chocolate chips gently to get that silky texture just right. The key is to temper the chocolate and allow it to cool slightly before pouring it into the molds.
After I mixed the creamy peanut butter with a touch of powdered sugar, I realized that a sprinkle of sea salt would add the perfect contrast to the sweetness. Not only did it enhance the flavor, but it also made these cups totally addicting!
Why You'll Love This Recipe
- Decadent chocolate flavor balanced with creamy peanut butter
- Easy to make with simple ingredients you likely have at home
- Perfect for gifting or satisfying your sweet tooth any time!
Choosing the Right Chocolate
When making your own Reese’s Cups, the choice of chocolate is crucial for achieving that decadent flavor. I recommend using high-quality chocolate chips, as they melt more smoothly and offer a richer taste. Semi-sweet chocolate is ideal for a classic flavor, but feel free to experiment with dark chocolate for a more intense flavor or milk chocolate for sweetness. Just keep an eye on your melting time, as different chocolate types vary slightly in how they react to heat.
It's also important to incorporate coconut oil with the chocolate. This addition not only aids in achieving a glossy finish but also helps with the chocolate's snap after it has set. Ensure you measure it accurately, as too much oil can make the chocolate too soft, while too little will prevent it from coating properly.
Perfecting the Peanut Butter Filling
The peanut butter filling is the heart of your homemade treats. Using creamy peanut butter is essential to create a smooth, easy-to-spread mixture. However, if you prefer a bit of crunch, swapping in crunchy peanut butter can provide that delightful texture. Just balance the consistency by adjusting the powdered sugar if it becomes too thick.
Incorporating vanilla extract adds a depth of flavor that enhances the overall taste. However, if you're looking to keep these dairy-free or use alternatives, you might try almond butter or sunflower seed butter as substitutions. Just remember, each nut butter variety has its own distinctive flavor, so choose one that aligns with your personal preference.
Ingredients
For the Cups
- 1 cup chocolate chips
- 1 tablespoon coconut oil
- 1/2 cup creamy peanut butter
- 1/4 cup powdered sugar
- 1/2 teaspoon vanilla extract
- Sea salt for sprinkling
Make sure to use high-quality chocolate for the best flavor!
Instructions
Melt the Chocolate
In a microwave-safe bowl, combine the chocolate chips and coconut oil. Microwave in 30-second intervals, stirring between each, until melted and smooth. Let it cool slightly.
Prepare the Molds
Line a muffin tin with cupcake liners. Pour a tablespoon of melted chocolate into the bottom of each liner, making sure it coats the sides slightly. Place the tin in the refrigerator for about 10 minutes to set.
Make the Filling
In a separate bowl, combine the peanut butter, powdered sugar, and vanilla extract until smooth. Once the chocolate has set, remove the tray from the refrigerator.
Assemble the Cups
Spoon about 1 tablespoon of the peanut butter mixture into each chocolate-coated liner. Top with more melted chocolate, filling it to the top. Sprinkle a pinch of sea salt on each cup and return to the refrigerator to set for another 20 minutes.
Enjoy!
Once fully set, peel away the cupcake liners and enjoy your homemade Reese’s Cups!
Store any leftovers in an airtight container in the refrigerator for up to a week.
Pro Tips
- For a fun twist, try adding crushed nuts or a drizzle of caramel on top of the peanut butter filling!
Storage Tips
Once you've assembled and set your Reese’s Cups, storing them properly is key to maintaining their delightful texture. Place them in an airtight container, separated by parchment paper, and keep them in the refrigerator. They will stay fresh for about two weeks. If you want to keep them longer, consider freezing them; they can last up to 3 months in the freezer while still retaining their taste and texture.
When ready to enjoy your frozen treats, simply transfer them to the refrigerator a few hours before serving to allow them to thaw gradually. This helps ensure they maintain their creamy center without becoming overly soft.
Serving Suggestions
For a fun twist, consider serving these homemade Reese’s Cups as part of a dessert platter alongside fresh fruits or a scoop of ice cream. They pair wonderfully with a rich vanilla or a chocolate-flavored ice cream, making for a delightful dessert experience.
Additionally, these treats make excellent gifts! Dress them up in decorative packaging or place them in a festive box. Who wouldn't appreciate a box of homemade goodies? Just remember to include a little note about any nut allergies if you're sharing with friends or family.
Questions About Recipes
→ Can I use different types of chocolate?
Absolutely! Milk chocolate, dark chocolate, or even white chocolate can be used to suit your taste.
→ How do I store these Reese's Cups?
Keep them in an airtight container in the refrigerator for up to a week.
→ Can I make these gluten-free?
Yes, just ensure that the chocolate chips and any other ingredients you use are labeled gluten-free.
→ What can I substitute for coconut oil?
You can use any neutral oil such as vegetable oil or even butter if you prefer.
Homemade Reese’s Cups with Sea Salt
What You'll Need
For the Cups
- 1 cup chocolate chips
- 1 tablespoon coconut oil
- 1/2 cup creamy peanut butter
- 1/4 cup powdered sugar
- 1/2 teaspoon vanilla extract
- Sea salt for sprinkling
How-To Steps
In a microwave-safe bowl, combine the chocolate chips and coconut oil. Microwave in 30-second intervals, stirring between each, until melted and smooth. Let it cool slightly.
Line a muffin tin with cupcake liners. Pour a tablespoon of melted chocolate into the bottom of each liner, making sure it coats the sides slightly. Place the tin in the refrigerator for about 10 minutes to set.
In a separate bowl, combine the peanut butter, powdered sugar, and vanilla extract until smooth. Once the chocolate has set, remove the tray from the refrigerator.
Spoon about 1 tablespoon of the peanut butter mixture into each chocolate-coated liner. Top with more melted chocolate, filling it to the top. Sprinkle a pinch of sea salt on each cup and return to the refrigerator to set for another 20 minutes.
Once fully set, peel away the cupcake liners and enjoy your homemade Reese’s Cups!
Extra Tips
- For a fun twist, try adding crushed nuts or a drizzle of caramel on top of the peanut butter filling!
Nutritional Breakdown (Per Serving)
- Calories: 120 kcal per cup
- Total Fat: 8g
- Saturated Fat: 3g
- Cholesterol: 0mg
- Sodium: 50mg
- Total Carbohydrates: 10g
- Dietary Fiber: 1g
- Sugars: 8g
- Protein: 3g